Not happy with the way a photo looks? You can easily change the color of an image in Photoshop with a few simple techniques, achieving your creative vision on any project.
Adobe Photoshop offers a range of options, including hue adjustments and precise color replacements. Beginners can find easy methods to enhance each image’s color style beautifully.
This special guide by Insiderbits covers six efficient methods to update image colors using PS. Get ready to master these skills and give each photo a brand-new look with minimum effort.
Related: The Best Photo Colorization App to Restore Loved Memories
How Do I Recolor an Image in Photoshop?

Recoloring an image in Photoshop offers flexibility for adapting colors to match any vision or style. There are plenty of different ways to do so, and we’re going to cover them all.
With Photoshop’s selection of color tools, adjusting hues and shades becomes an easy task. Let’s walk through five basic steps to recolor images with precision and control.
- Select the Layer: Open the image you want in Photoshop and ensure the correct layer is active, containing the area you wish to recolor.
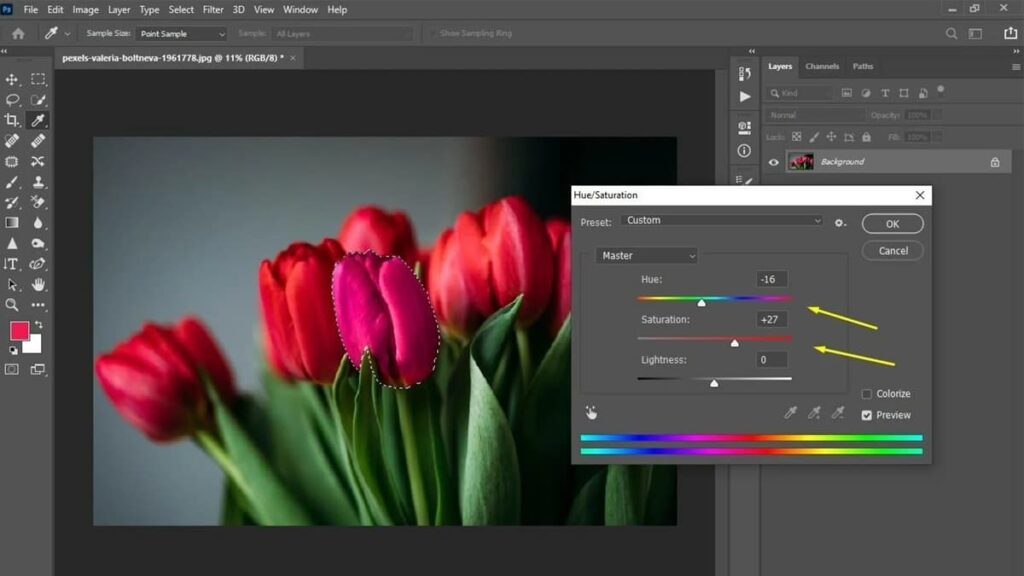
- Access Hue/Saturation: Go to Image > Adjustments > Hue/Saturation. This adjustment tool allows for fast color manipulation by modifying hue, saturation, and lightness levels.
- Adjust Hue Slider: Move the Hue slider until you reach your desired color. Watch as the image color transforms immediately, reflecting your new tone accurately.
- Refine Saturation and Lightness: Fine-tune the Saturation and Lightness sliders to enhance or soften the color effect, adding depth or subtlety as needed.
- Apply and Save: Once satisfied, click OK to confirm changes. Save your project in the desired format to keep the recolored version readily accessible.
How Do I Change the Color of the Image?
Adobe Photoshop makes it easy to change the color of an image, offering even more powerful tools to transform visuals. With a few simple steps, you can create a fresh look effortlessly.
Using techniques that adjust tones and hues precisely, Photoshop provides you the ability to play with different tones. Here’s another way you can transform colors in any photo effectively.
- Duplicate the Layer: Start by duplicating the original layer to keep an unaltered backup and apply edits only on the other layer. Do so by clicking with the right mouse button.
- Access Color Replacement Tool: Select the Color Replacement tool from the toolbar. This powerful tool allows precise control when swapping specific colors in your image.
- Choose New Color: Set your desired color as the foreground color. This is the color that will replace the original shade in the selected areas.
- Paint Over the Area: Using the brush, carefully paint over the parts of the image you want to change, ensuring smooth, consistent application for accurate transformation.
- Refine Edges and Save: Review and refine the edges for a polished look. When satisfied, save the file in your preferred format to preserve changes.
Changing colors in Photoshop offers control over every pixel, helping you achieve the ideal color for each part of your image. These steps make the process efficient and effective.
With Photoshop’s collection of color tools, you can adjust any image to fit a specific mood or style. Experiment with different shades and techniques to unlock creative potential.
Related: App to Colorize Old Photos in Less Than 1 Minute
How Do I Change an Image to One Color in Photoshop?

Turning an image into a single color in Photoshop is a fantastic way to change it and create a uniform look. With a few steps, you can easily achieve this satisfying monochrome effect.
Photoshop’s tools allow you to change the image color with ease, converting visuals into one consistent hue. Follow these simple steps to bring a cohesive color tone to any photo.
- Open the Image: Start by opening your image in Photoshop. Make sure to work on a duplicate layer to preserve the original file.
- Select Solid Color Adjustment: Click on the Adjustment Layer icon, then choose “Solid Color.” This feature lets you apply a single, uniform color over your image.
- Choose Desired Color: Select your preferred color from the color picker. This will serve as the dominant tone for your entire image, creating a unified effect.
- Set Blending Mode to Color: Change the layer’s blending mode to “Color”. This option overlays your chosen hue onto the image without affecting details.
- Adjust Opacity as Needed: Fine-tune the opacity to control the intensity of the color overlay. This gives flexibility in balancing the new hue with underlying details.
Applying a single color to an image in Photoshop can create a striking, cohesive look. These straightforward steps make it easy to achieve the desired effect within minutes.
This approach is perfect for consistent branding, artistic edits, or themed visuals. Play around with different colors and opacity levels to discover your desired style effortlessly.
How Do You Replace a Color with a Specific Color in Photoshop?
When you need to replace a color with an exact shade, Photoshop offers a simple solution. Below, you’ll learn how to change image color in Photoshop to match your vision perfectly.
Using Photoshop’s Replace Color tool, you can adjust any color in your image precisely. Follow these steps to achieve exact matches with ease and professional accuracy.
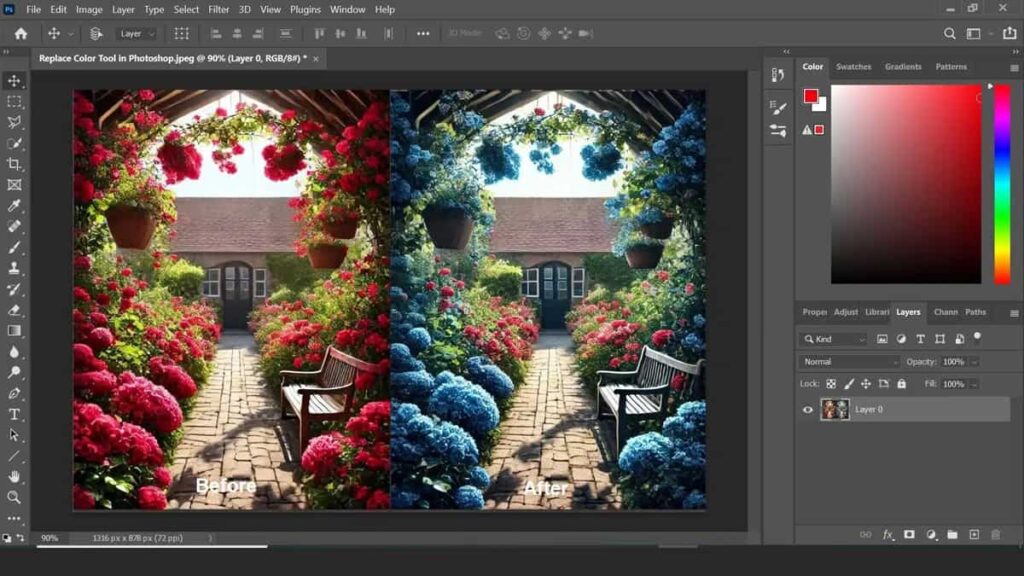
- Open Replace Color Tool: Go to Image > Adjustments > Replace Color. This tool detects and replaces selected colors with minimal effort, providing exact color matching.
- Select the Target Color: Click on the color in your image you wish to change. Adjust Fuzziness to control how much of the surrounding color is selected.
- Choose New Color: From the color picker, select the specific color you want to apply. This will replace the target color, bringing a uniform tone.
- Adjust Saturation and Lightness: Modify the Saturation and Lightness settings as needed to fine-tune the new color’s vibrancy and brightness for a balanced appearance.
- Confirm and Save Changes: Click OK to apply the new color. Save your updated file to keep the edited version for future use or adjustments.
Replacing colors in Photoshop is an efficient way to tailor images precisely to your needs. Make sure to always change the duplicate layer so you can go back to the original one if needed.
Related: How To Edit A Prom Picture For Frame Easily And For Free
How to Use Gradient Maps to Change Image Colors in Photoshop

Gradient Maps allow you to create dynamic color transformations. This tool maps specific tones onto gradients, making it easy to change an image color in Photoshop.
With Gradient Maps, you can adjust hues creatively and add depth to your images. Follow these steps to learn how to transform photos with impressive color effects.
- Open the Gradient Map Tool: Go to Layer > New Adjustment Layer > Gradient Map. This creates an adjustment layer specifically designed for color gradient applications.
- Select Desired Gradient: Choose from Photoshop’s preset gradients or customize one to fit your style. This will determine the color range applied to your image.
- Adjust Gradient Stops: Click on gradient stops to change specific colors within the gradient. Modify these to match the tones you want to emphasize or replace.
- Experiment with Blending Modes: Change the blending mode of the Gradient Map layer. Options like “Overlay” or “Soft Light” can enhance depth and create unique effects.
- Fine-Tune Opacity: Adjust the layer’s opacity to control the intensity of the gradient effect. Lowering opacity lets you blend the gradient subtly over the image.
Using Gradient Maps in Photoshop enables creative control over color shifts and gradients. These simple steps make it easy to create visually captivating results with minimal effort.
This method is perfect for artistic projects or creating specific moods in images. Experiment with Gradient Maps to find the color combinations that bring your vision to life.
How to Use the Color Replacement Tool to Modify Image Colors in Photoshop
Photoshop’s Color Replacement Tool makes it easy to modify specific colors with precision. If you want to change image color, Photoshop offers this efficient tool to get seamless results.
Using the Color Replacement Tool, you can recolor parts of an image accurately without losing detail. Here’s how to use this tool effectively in just a few steps.
- Select the Color Replacement Tool: Find it in the Brush Tool dropdown. This tool is ideal for replacing specific colors while preserving texture and shading.
- Choose Target Color and Brush Settings: Set your new color as the foreground color. Adjust brush size and hardness based on the area you want to recolor.
- Select a Sampling Mode: Choose “Continuous” to adjust colors as you move, or “Once” to replace only the initially selected color, keeping control over the application.
- Paint Over the Desired Area: Begin painting over the area to replace the color. Photoshop applies the new color while retaining shadows and textures naturally.
- Refine with the Tolerance Slider: Adjust Tolerance to control the range of colors replaced. Lower tolerance for specific color changes or raise it for broader effects.
Related: The Best App to Detect Colors Using Your Phone’s Camera – Color Detector
Complete Your Photoshop Color Changes with Confidence
Each method in this guide gives you easy and effective ways to edit colors in Photoshop. With practice, these steps will feel natural, helping you achieve the perfect results.
Editing hues or swapping colors, Photoshop’s tools provide exceptional creative control. You can now confidently change any image color in Photoshop to suit your project’s style.
This guide by Insiderbits is designed to bring you practical tips for better photo editing. We hope these methods make your Photoshop color adjustments easier and more enjoyable.
For more tips on image editing and other color-correcting tools and apps, keep visiting Insiderbits. We’re here to help you enhance your skills and create images you’ll love!


