Unlock the secrets of Roblox clothing creation with our comprehensive guide. Whether you’re a beginner or an experienced designer, this article will walk you through the entire process of creating and uploading custom clothes for your Roblox avatar.
From mastering the essential tools and templates to crafting eye-catching designs and effectively marketing your creations, we’ve got you covered.
Discover the tips, tricks, and best practices that will help you bring your Roblox fashion ideas to life and start earning Robux through your unique clothing designs.
The Best Tools for Creating Roblox Clothes
- Paint.net: This is a popular choice among Roblox clothing designers due to its ease of use and availability of tutorials. It is particularly recommended for beginners.
- Adobe Photoshop: While it requires more skill to master, Photoshop offers extensive features and is widely used by experienced designers.
- GIMP: Another free and open-source option, GIMP is a powerful tool for creating Roblox clothes, though it may be more challenging for beginners.
- Pixlr: Pixlr offers a Roblox Clothes Maker with a variety of templates and customization options, making it a user-friendly choice for those who prefer a more guided approach.
- Ibis Paint X and Medibang Paint Pro: These mobile apps are suitable for designing Roblox clothes on mobile devices, such as iPads.
How do I Test my Roblox Clothing Designs Before Uploading?
- Use the Roblox Clothing Previewer Plugin: This plugin allows you to preview your clothing designs directly in Roblox Studio without having to upload them first.
- Try the Roviewer or BloxMake Clothing Previewer Websites: These third-party tools let you upload your clothing designs and see how they will look on an avatar, without the need for Roblox Studio.
- Copy the Decal ID and Test in a Game: After uploading your clothing template to the Roblox decals page, you can copy the ID and paste it into a character model in a test game to preview it.
These methods enable you to thoroughly test your Roblox clothing creations before spending the 50 Robux required to officially upload them.
How to Create Clothes for Roblox? A Step-by-Step Guide
Creating custom clothing for your Roblox avatar is a great way to showcase your creativity and potentially earn Robux by selling your designs.
Here’s a detailed step-by-step guide to help you get started:
Choose a Design Tool
Select a design tool that suits your skill level and preferences. Some popular options include:
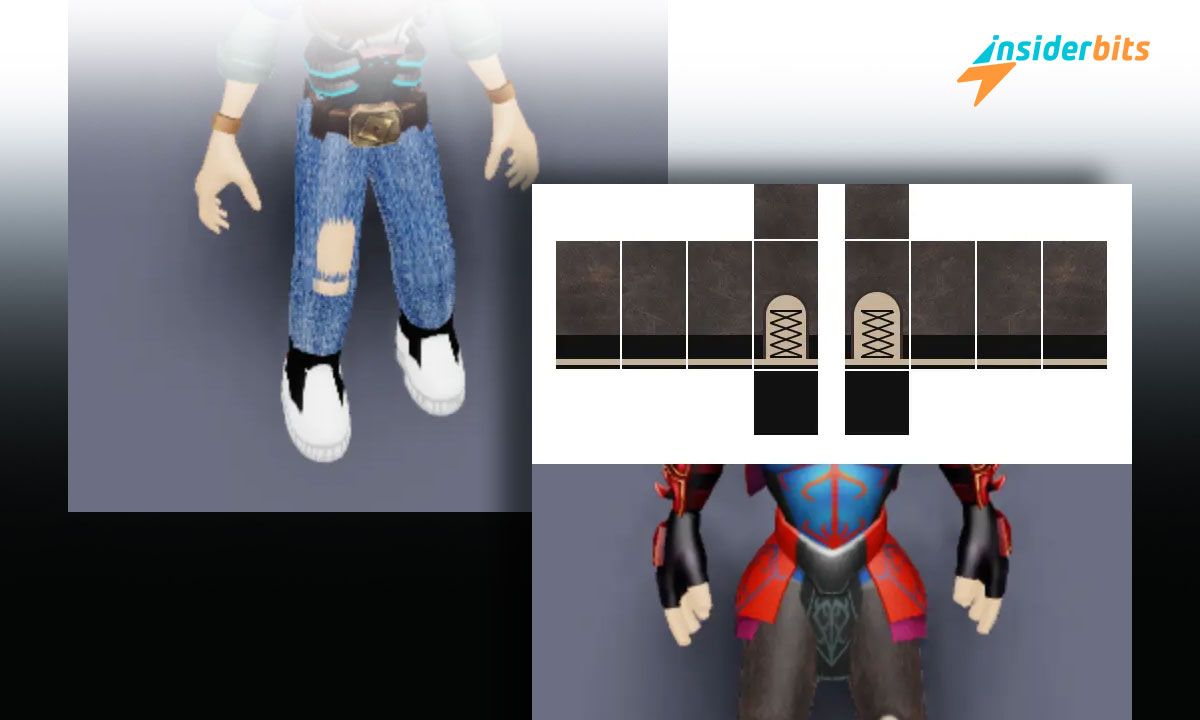
Download the Shirt or Pants Template
- Log in to your Roblox account and go to the Avatar page.
- Click on “Clothing” and select either “Shirts” or “Pants”.
- Click on “Create” and choose the template you want to use (shirt or pants).
- Click on the link to download the template.
- Save the template to your computer.
Design Your Clothing
Open the template in your chosen design tool and start creating your clothing design. Here are some tips:
- Use layers to create a color guide and arrange designs in the correct position.
- Ensure your design is 585 pixels by 559 pixels.
- Avoid using copyrighted material in your design.
- Make your design look unique and eye-catching.
- Use other designs for inspiration but don’t copy them directly.
Test Your Design
As previously explained in this article, before uploading your clothing, test it to ensure it looks as expected. Follow this guide to test your clothes:
- Use the Roblox Clothing Previewer Plugin in Roblox Studio.
- Try the Roviewer or BloxMake Clothing Previewer websites.
- Copy the Decal ID and test in a Roblox game.
Upload Your Clothing
- Log in to your Roblox account and go to the Avatar page.
- Click on “Clothing” and select either “Shirts” or “Pants”.
- Click on “Create” and select your edited template file.
- Name your design and ensure it complies with Roblox’s Community Rules.
- Click “Upload for 10 Robux” to upload your clothing.
Monetize Your Clothing
If you have a Roblox Premium account, you can sell your clothing designs:
- Go to your Avatar page and click on “Clothing”.
- Find your uploaded clothing and click on the gear icon to configure it.
- In the “Sales” tab, toggle the “Item for Sale” slider to enable selling.
- Set your desired price (minimum 5 Robux) and save the changes.
Ultimate Guide to Roblox Clothing Creation – Conclusion
Creating custom clothing for your Roblox avatar is a rewarding and potentially lucrative endeavor. By choosing the right design tool, downloading the appropriate template, and following a step-by-step process, you can bring your fashion ideas to life.
Testing your designs before uploading ensures they meet your expectations while monetizing your creations allows you to earn Robux.
With creativity, dedication, and an understanding of Roblox’s guidelines, you can design and sell unique clothing that stands out in the vast Roblox Marketplace
Like this article? Add the Insiderbits blog to your favorites and visit us whenever you want to learn new and exciting information about technology and much more!


